¶ Complete Zabbix(7) and Grafana Installation on OCI Always Free AlmaLinux
Necessary requirements:
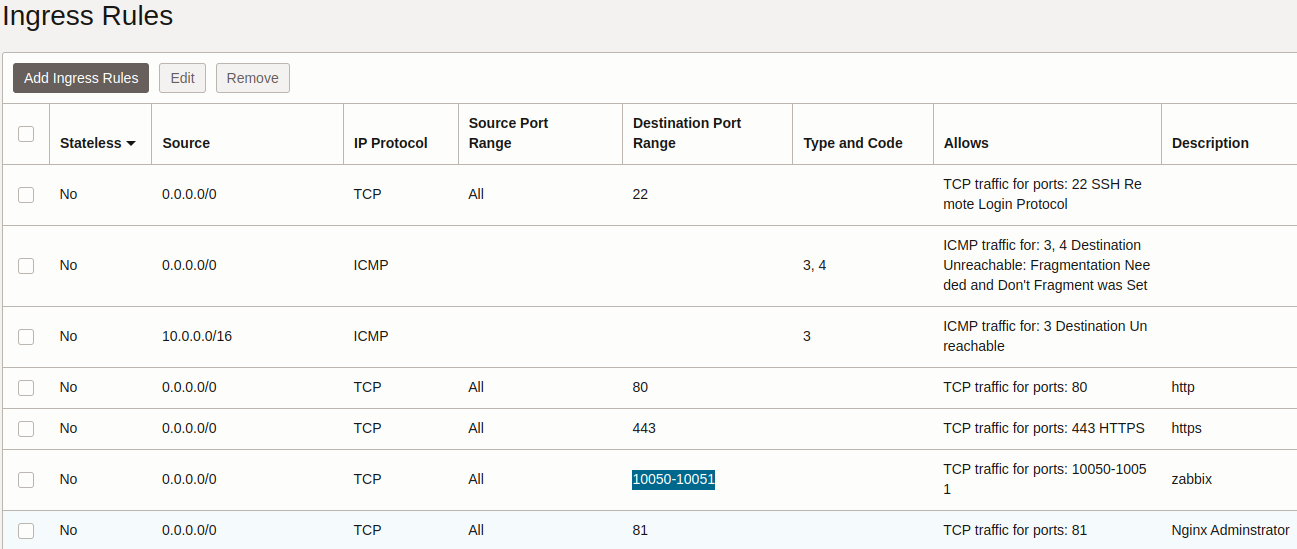
Access to OCI to create your AlmaLinux 9 VM on arm64 architecture with ports 22, 80, 81, 443, 10050 e 10051 released as below
Access DNS management to create three entries (oracle-01, zabbix-teste, grafana-teste) as below
NOTES:
You MUST change the domain tiozaodolinux.com to yours
I use Oracle Cloud to manage my machines
I use CloudFlare to manage DNS
Why Arm-based in OCI
Why AlmaLinux on OCI
¶ Access your VM with ssh
While in Ubuntu the default access user is ubuntu, AlmaLinux has opc as the default user.
We will access and enable remote login directly with root without a password.
ssh [email protected]
Last login: Sat Feb 17 08:15:32 2024 from 177.17.194.235
[opc@oracle-01 ~]$

[opc@oracle-01 ~]$ sudo su -
Last login: Sun Feb 18 07:05:32 -04 2024 from 177.17.194.235 on pts/0
[root@oracle-01 ~]#

[root@oracle-01 ~]# cp /home/opc/.ssh/authorized_keys ~/.ssh/
cp: overwrite '/root/.ssh/authorized_keys'? y
[root@oracle-01 ~]# exit
[opc@oracle-01 ~]$ exit
logout
Connection to oracle-01.tiozaodolinux.com closed.
ssh [email protected]
[root@oracle-01 ~]#
¶ Install additional packages
dnf -y install epel-release

dnf -y install wget htop tmux nmap mc nano vim bash-completion sysstat jq expect chrony \
PackageKit-command-not-found s3fs-fuse ccze cowsay tree net-tools whois speedtest-cli \
neofetch cpufetch boxes figlet toilet \
tar zip gzip bzip2 unzip yum-utils fping fastfetch

systemctl enable --now sysstat.service

rpm -Uvh https://github.com/muesli/duf/releases/download/v0.8.1/duf_0.8.1_linux_arm64.rpm
¶ What does this duf do?
duf --only local
╭────────────────────────────────────────────────────────────────────╮
│ 3 local devices                                                    │
├────────────┬────────┬────────┬────────┬────────┬──────┬────────────┤
│ MOUNTED ON │   SIZE │   USED │  AVAIL │  USE%  │ TYPE │ FILESYSTEM │
├────────────┼────────┼────────┼────────┼────────┼──────┼────────────┤
│ /          │  45.8G │  13.5G │  32.3G │  29.5% │ xfs  │ /dev/sda3  │
│ /boot      │ 448.0M │ 175.2M │ 272.8M │  39.1% │ xfs  │ /dev/sda2  │
│ /boot/efi  │ 199.8M │   7.0M │ 192.8M │   3.5% │ vfat │ /dev/sda1  │
╰────────────┴────────┴────────┴────────┴────────┴──────┴────────────╯
¶ See neofetch information
neofetch

        #####           root@oracle-01
       #######          --------------
       ##O#O##          OS: AlmaLinux 9.3 (Shamrock Pampas Cat) aarch64
       #######          Host: KVM Virtual Machine virt-4.2
     ###########        Kernel: 5.14.0-362.18.1.el9_3.aarch64
    #############       Uptime: 3 hours, 55 mins
   ###############      Packages: 804 (rpm)
   ################     Shell: bash 5.1.8
  #################     Resolution: 1024x768
#####################   Terminal: /dev/pts/0
#####################   CPU: (2)
  #################     GPU: 00:01.0 Red Hat, Inc. Virtio 1.0 GPU
                        Memory: 2142MiB / 11614MiB
¶ Install oracle-cloud-agent
Metrics are measurements that let you monitor the health, capacity, and performance of your resources.
dnf -y install snapd

ln -s /var/lib/snapd/snap /snap

systemctl enable --now snapd

snap install oracle-cloud-agent --classic
¶ Enable extra SWAP of 4GB
fallocate -l 4G /swapfile
chmod 600 /swapfile
mkswap /swapfile
swapon /swapfile
echo '/swapfile none swap sw 0 0' | tee -a /etc/fstab
¶ Create script to release swap
cat << '_EOF' > /root/swapclean.sh
#!/bin/bash
# https://help.ubuntu.com/community/SwapFaq
export PATH="/usr/sbin:/usr/bin:/sbin:/bin"

echo "========"
echo "Before - `date`"
echo "========"
free -h

sync
echo 3 > /proc/sys/vm/drop_caches

mem=$(LC_ALL=C free  | awk '/Mem:/ {print $4}')
swap=$(LC_ALL=C free | awk '/Swap:/ {print $3}')

if [ $mem -lt $swap ]; then
    echo "ERROR: [$swap > $mem]not enough RAM to write swap back, nothing done" >&2
  exit 1
fi

if [ $swap -gt 0 ]; then
    swapoff -a
    swapon -a
fi

echo "========"
echo "After - `date` "
echo "========"
free -h
_EOF

chmod +x /root/swapclean.sh
¶ Tiozão Customization
¶ Timezone adjustment
timedatectl set-timezone America/Campo_Grande
¶ Add pt_BR and en_US languages
dnf -y install glibc-langpack-en glibc-langpack-pt

localectl set-locale en_US.UTF-8
¶ Tiozão's reception
cat << '_EOF' > /etc/profile.d/zz-welcome.sh
echo -e "\nTiozão do Linux\ntwitter.com/TiozaoDoLinux\nwiki.TiozaoDoLinux.com" | boxes -d dog -a c -s 80
echo -e "Servidor AlmaLinux - $HOSTNAME\n\n`date`" | boxes -d parchment -a c -s 80
_EOF

cat << '_EOF' > ~/.bash_aliases
alias remove-comments="grep -v -E '^(#|$|[[:space:]])'"
alias meuip='curl -s http://ipinfo.io/json/ | jq'
_EOF

cat << '_EOF' >> ~/.bashrc
# Alias extra definitions
if [ -f ~/.bash_aliases ]; then
    . ~/.bash_aliases
fi

# 'history' personalization
HISTCONTROL=ignoredups:ignorespace
shopt -s histappend
HISTSIZE=1000
HISTFILESIZE=2000
HISTTIMEFORMAT="%F %T "
export TERM=xterm

# Root Prompt
PS1='\[\e[1;31m\]\342\224\214\342\224\200\[\e[1;31m\][\[\e[1;33m\]\u\[\e[1;37m\]@\[\e[1;36m\]\h\[\e[1;31m\]]\[\e[1;31m\]\342\224\200\[\e[1;31m\][\[\e[1;33m\]\w\[\e[1;31m\]]\[\e[1;31m\]\342\224\200[\[\e[1;37m\]\d \t\[\e[1;31m\]]\n\[\e[1;31m\]\342\224\224\342\224\200\342\224\200\342\225\274\[\e[1;37m\] \$ \[\e[0m\]'
_EOF
See what personalization looks like when logging in 😎
ssh [email protected]
Activate the web console with: systemctl enable --now cockpit.socket

Last login: Sat Feb 17 18:20:30 2024 from 177.17.194.235
                              __   _,--="=--,_   __
                             /  \."    .-.    "./  \
                            /  ,/  _   : :   _  \/` \
                            \  `| /o\  :_:  /o\ |\__/
                             `-'| :="~` _ `~"=: |
                                \`     (_)     `/ jgs
                         .-"-.   \      |      /   .-"-.
.-----------------------{     }--|  /,.-'-.,\  |--{     }----------------------.
 )                      (_)_)_)  \_/`~-===-~`\_/  (_(_(_)                     (
(                                                                              )
 )                              Tiozão do Linux                               (
(                          twitter.com/TiozaoDoLinux                           )
 )                           wiki.TiozaoDoLinux.com                           (
'------------------------------------------------------------------------------'
 ____________________________________________________________________________
/\                                                                           \
\_|             Servidor AlmaLinux - oracle-01.tiozaodolinux.com             |
  |                                                                          |
  |                     Sat Feb 17 18:29:39 PM -04 2024                      |
  |   _______________________________________________________________________|_
   \_/_________________________________________________________________________/
┌─[root@oracle-01]─[~]─[Sat Feb 17 18:29:39]
└──╼ #
¶ Configure the Firewall
#firewall-cmd --get-services

ZONE=`firewall-cmd --get-default-zone`

firewall-cmd --zone=$ZONE --permanent --add-service=http
firewall-cmd --zone=$ZONE --permanent --add-service=https
firewall-cmd --zone=$ZONE --permanent --add-service=zabbix-agent
firewall-cmd --zone=$ZONE --permanent --add-service=zabbix-server
firewall-cmd --zone=$ZONE --permanent --add-service=grafana
firewall-cmd --zone=$ZONE --permanent --add-port=81/tcp

firewall-cmd --reload

firewall-cmd --list-all
#firewall-cmd --list-services --zone=$ZONE
#firewall-cmd --list-ports --zone=$ZONE
¶ Watch the logs
tail -f /var/log/firewalld
¶ Disable Selinux (optional)
setenforce 0

sed -i s/^SELINUX=.*$/SELINUX=permissive/ /etc/selinux/config
¶ Install and configure fail2ban
dnf -y install fail2ban
cat << '_EOF' > /etc/fail2ban/jail.local
[DEFAULT]

# This will ignore connection coming from common private networks.
# Note that local connections can come from other than just 127.0.0.1, so
# this needs CIDR range too.
ignoreip = 127.0.0.0/8 10.0.0.0/8 172.16.0.0/12 192.168.0.0/16

# "bantime" is the number of seconds that a host is banned.
bantime  = 3h

# A host is banned if it has generated "maxretry" during the last "findtime"
findtime  = 1h

# "maxretry" is the number of failures before a host get banned.
maxretry = 2

[sshd]
enabled = true
_EOF
systemctl enable --now fail2ban.service
¶ Watch the logs
# view status with *Banned IP list*
fail2ban-client status sshd

# view logs in real time
tail -f /var/log/fail2ban.log | ccze -A

# unban only one IP
fail2ban-client unban 179.181.176.166

# unban all IPs
fail2ban-client unban --all
¶ Install and configure Docker
dnf -y install yum-utils
yum-config-manager --add-repo https://download.docker.com/linux/centos/docker-ce.repo
dnf -y install docker-ce docker-ce-cli containerd.io docker-buildx-plugin docker-compose-plugin
cat << '_EOF' > /etc/docker/daemon.json
{
  "log-driver": "json-file",
  "log-opts": {"max-size": "10m", "max-file": "3"},
  "default-address-pools" : [
    {
      "base" : "172.17.0.0/12",
      "size" : 20
    },
    {
      "base" : "192.168.0.0/16",
      "size" : 24
    }
  ]
}
_EOF
systemctl enable --now docker.socket docker.service
mkdir -p ~/.docker
cat << '_EOF_' > ~/.docker/config.json
{
    "imagesFormat": "table"
}
_EOF_
¶ Install some containers
¶ Install nginx proxy manager to manage certificates
See more: https://github.com/NginxProxyManager/nginx-proxy-manager
mkdir -p /root/docker/nginx-proxy-manager/
cd /root/docker/nginx-proxy-manager/

cat << '_EOF' > docker-compose.yml
# https://nginxproxymanager.com/guide/#quick-setup

services:
  app:
    image: 'jc21/nginx-proxy-manager:latest'
    restart: unless-stopped
    ports:
      - '80:80'   # Public HTTP Port
      - '443:443' # Public HTTPS Port
      - '81:81'   # Admin Web Port
    volumes:
      - ./data:/data
      - ./letsencrypt:/etc/letsencrypt
_EOF

docker compose up -d
¶ Go to your http://oracle-01.tiozaodolinux.com:81 URL and finish NPM setup
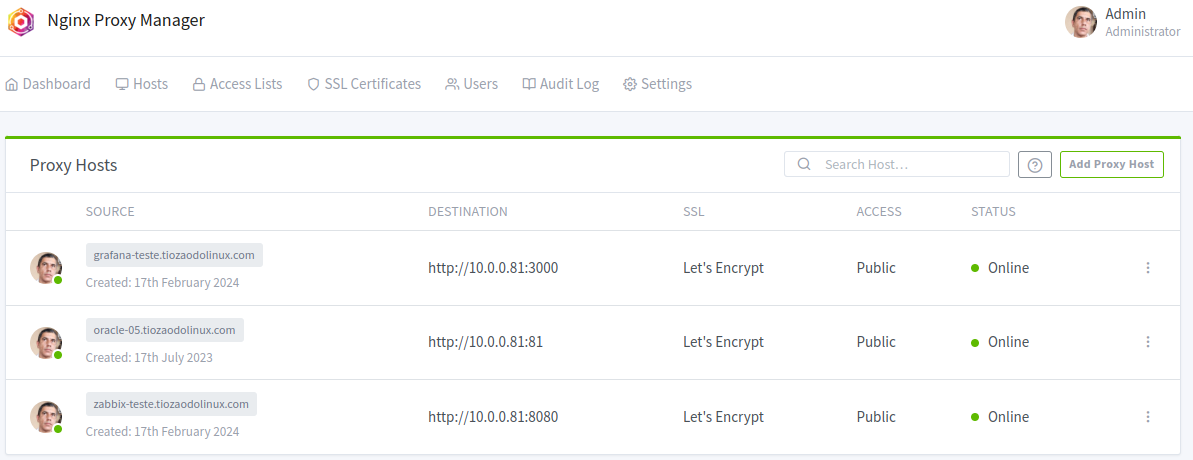
On fresh NPM installation, the username is [email protected], and the password is changeme.
Change your password for security reasons
¶ Enable automatic container updater
mkdir -p /root/docker/watchtower/
cd /root/docker/watchtower/

cat << '_EOF' > docker-compose.yml
#  https://github.com/nicholas-fedor/watchtower
services:
  watchtower:
    image: nickfedor/watchtower
    container_name: watchtower
    hostname: watchtower-oracle-XX
    volumes:
      - /var/run/docker.sock:/var/run/docker.sock
    environment:
      - TZ=America/Campo_Grande
      - WATCHTOWER_SCHEDULE=0 0 4 * * *
#      - WATCHTOWER_NOTIFICATIONS= email
#      - [email protected]
#      - [email protected]
#      - WATCHTOWER_NOTIFICATION_EMAIL_SERVER=smtp.gmail.com
#      - WATCHTOWER_NOTIFICATION_EMAIL_SERVER_PORT=587
#      - WATCHTOWER_NOTIFICATION_EMAIL_SERVER_USER=tiozaodolinux@gmail.com
#      - WATCHTOWER_NOTIFICATION_EMAIL_SERVER_PASSWORD=xxxxxxxxxxxxxxxx
#      - WATCHTOWER_NOTIFICATION_EMAIL_DELAY=2
    restart: unless-stopped
_EOF

docker compose up -d
¶ Enable db auto backup
See more: https://github.com/RealOrangeOne/docker-db-auto-backup
mkdir -p /root/docker/docker-db-auto-backup/
cd /root/docker/docker-db-auto-backup/

cat << '_EOF' > docker-compose.yml

services:
  backup:
    image: ghcr.io/realorangeone/db-auto-backup:latest
    restart: unless-stopped
    volumes:
      - /var/run/docker.sock:/var/run/docker.sock:ro
      - ./backups:/var/backups
    environment:
      #- COMPRESSION=gzip
      - TZ="America/Campo_Grande"
      #- SCHEDULE=0 0 * * *  # Default @midnight
      #- SCHEDULE=0 * * * *  # hourly
      - SCHEDULE=0 21 * * *  # at 9 PM
      #- SUCCESS_HOOK_URL=https://hc-ping.com/1234
      #- INCLUDE_LOGS=true
_EOF

docker compose up -d
¶ Install Mysql Server

dnf -y install mysql mysql-server
¶ Make some otimizations of mysql
cat << '_EOF' > /etc/my.cnf.d/90_optimize.cnf
[mysqld]
max_connections                = 500
innodb_buffer_pool_size        = 8G				## This parameter is closely related to server memory

innodb_redo_log_capacity       = 128M
innodb-log-buffer-size         = 128M
innodb-file-per-table          = 1
innodb_buffer_pool_instances   = 8
innodb_old_blocks_time         = 1000
innodb_stats_on_metadata       = off
innodb-flush-method            = O_DIRECT
innodb-log-files-in-group      = 2
innodb-flush-log-at-trx-commit = 2

tmp-table-size                 = 96M
max-heap-table-size            = 96M
open_files_limit               = 65535
max_connect_errors             = 1000000
connect_timeout                = 60
wait_timeout                   = 28800

binlog_expire_logs_seconds     = 360
max_binlog_size                = 100M
_EOF
¶ Enable and start mysql service
systemctl enable --now mysqld.service
¶ Show some mysql settings
mysql
mysql> SHOW GLOBAL VARIABLES LIKE '%max_con%';
+---------------------------------------+---------+
| Variable_name                         | Value   |
+---------------------------------------+---------+
| max_connect_errors                    | 1000000 |
| max_connections                       | 500     |
| mysqlx_max_connections                | 100     |
| performance_schema_max_cond_classes   | 150     |
| performance_schema_max_cond_instances | -1      |
+---------------------------------------+---------+
5 rows in set (0.00 sec)
mysql> SHOW GLOBAL VARIABLES LIKE '%innodb_buffer%';
+-------------------------------------+----------------+
| Variable_name                       | Value          |
+-------------------------------------+----------------+
| innodb_buffer_pool_chunk_size       | 134217728      |
| innodb_buffer_pool_dump_at_shutdown | ON             |
| innodb_buffer_pool_dump_now         | OFF            |
| innodb_buffer_pool_dump_pct         | 25             |
| innodb_buffer_pool_filename         | ib_buffer_pool |
| innodb_buffer_pool_in_core_file     | ON             |
| innodb_buffer_pool_instances        | 8              |
| innodb_buffer_pool_load_abort       | OFF            |
| innodb_buffer_pool_load_at_startup  | ON             |
| innodb_buffer_pool_load_now         | OFF            |
| innodb_buffer_pool_size             | 8589934592     |
+-------------------------------------+----------------+
11 rows in set (0.00 sec)
mysql> SHOW GLOBAL VARIABLES LIKE '%max_bin%';
+----------------------------+----------------------+
| Variable_name              | Value                |
+----------------------------+----------------------+
| max_binlog_cache_size      | 18446744073709547520 |
| max_binlog_size            | 104857600            |
| max_binlog_stmt_cache_size | 18446744073709547520 |
+----------------------------+----------------------+
3 rows in set (0.00 sec)
¶ Tuner mysql
dnf -y install mysqltuner

mysqltuner
 >>  MySQLTuner 1.8.3 - Major Hayden <[email protected]>
 >>  Bug reports, feature requests, and downloads at http://mysqltuner.pl/
 >>  Run with '--help' for additional options and output filtering

[--] Skipped version check for MySQLTuner script
[!!] Successfully authenticated with no password - SECURITY RISK!
[OK] Currently running supported MySQL version 8.0.36
[OK] Operating on 64-bit architecture

-------- Log file Recommendations ------------------------------------------------------------------
[OK] Log file /var/log/mysql/mysqld.log exists
...
...
...
¶ Install Zabbix agent, proxy, server and frontend

👆Image credits above👆: https://zabbix.com
¶ Install Zabbix repository
Disable Zabbix packages provided by EPEL, if you have it installed.
Edit file /etc/yum.repos.d/epel.repo and add the following statement.
[epel]
...
excludepkgs=zabbix*
¶ Proceed with installing zabbix repository.
rpm -Uvh https://repo.zabbix.com/zabbix/7.0/alma/9/x86_64/zabbix-release-7.0-5.el9.noarch.rpm
¶ Install Zabbix agent
👆Image credits above👆: https://bestmonitoringtools.com/zabbix-agent-linux-install-on-ubuntu-centos-rhel-debian-rasbian/
There is only a version of zabbix-agent2 for the aarch64 architecture in version 7.0 or higher
Agent vs agent 2 comparison
https://www.zabbix.com/documentation/7.0/en/manual/appendix/agent_comparison
Itens only supported by agent 2 https://www.zabbix.com/documentation/current/en/manual/config/items/itemtypes/zabbix_agent/zabbix_agent2
dnf -y install zabbix-get zabbix-sender zabbix-agent2 zabbix-agent2-plugin-*

# make a copy of the original configuration
cp /etc/zabbix/zabbix_agent2.conf /etc/zabbix/zabbix_agent2.conf.orig

cat << '_EOF' > /etc/zabbix/zabbix_agent2.conf
PidFile=/var/run/zabbix/zabbix_agent2.pid
LogFile=/var/log/zabbix/zabbix_agent2.log
LogFileSize=0
Timeout=30
Server=127.0.0.0/8,10.0.0.0/8,172.16.0.0/12,192.168.0.0/16
ServerActive=zabbix-teste.tiozaodolinux.com
Hostname=oracle-01.tiozaodolinux.com
TLSConnect=psk
TLSAccept=unencrypted,psk
TLSPSKIdentity=PSK ORACLE-01
TLSPSKFile=/etc/zabbix/zabbix_secret_key.psk
AllowKey=system.run[*]
Plugins.SystemRun.LogRemoteCommands=1
ControlSocket=/run/zabbix/agent.sock
Include=/etc/zabbix/zabbix_agent2.d/*.conf
Include=./zabbix_agent2.d/plugins.d/*.conf
_EOF

# Generate the secret key
openssl rand -hex 32 > /etc/zabbix/zabbix_secret_key.psk
¶ Enable user zabbix like admin
cat << '_EOF' > /etc/sudoers.d/zabbix-nopasswd
zabbix ALL=(ALL) NOPASSWD: ALL
_EOF
¶ Enable agent2
usermod -a -G docker zabbix
systemctl enable --now zabbix-agent2.service

systemctl status zabbix-agent2.service
¶ Install Zabbix Proxy
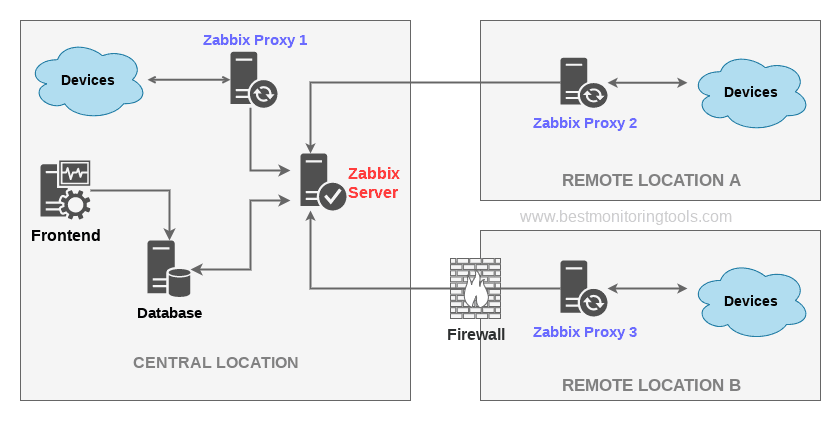
👆Image credits above👆: https://bestmonitoringtools.com/install-zabbix-proxy-on-centos-rhel/
CAUTION: When installing zabbix-proxy on the same host as zabbix-server, change the
ListenPortparameter. The default for both services is ListenPort=10051.SUGESTION: In zabbix-proxy, use ListenPort=10052
dnf -y install zabbix-proxy-sqlite3 zabbix-selinux-policy

# make a copy of the original configuration
cp /etc/zabbix/zabbix_proxy.conf /etc/zabbix/zabbix_proxy.conf.orig

cat << '_EOF' > /etc/zabbix/zabbix_proxy.conf
Server=zabbix-teste.tiozaodolinux.com
ListenPort=10052
Hostname=Proxy Client-01
LogFile=/var/log/zabbix/zabbix_proxy.log
EnableRemoteCommands=1
LogRemoteCommands=1
LogFileSize=0
PidFile=/run/zabbix/zabbix_proxy.pid
SocketDir=/run/zabbix

DBName=/tmp/zabbix_proxy

SNMPTrapperFile=/var/log/snmptrap/snmptrap.log

StartHTTPAgentPollers=2
StartPollers=5
StartSNMPPollers=1
StartPollersUnreachable=2
StartPingers=2
StartDiscoverers=2

ProxyOfflineBuffer=24
ProxyConfigFrequency=60
DataSenderFrequency=1

StartVMwareCollectors=1
VMwareCacheSize=8M
VMwareTimeout=10

ExternalScripts=/usr/lib/zabbix/externalscripts
StatsAllowedIP=127.0.0.1

TLSConnect=psk
TLSAccept=psk
TLSPSKIdentity=PSK PROXY CLIENT 01
TLSPSKFile=/etc/zabbix/zabbix_proxy.psk
_EOF

# Generate the secret key
openssl rand -hex 32 > /etc/zabbix/zabbix_proxy.psk
¶ Enable proxy
systemctl enable --now zabbix-proxy.service

systemctl status zabbix-proxy.service
¶ Install Zabbix server and frontend
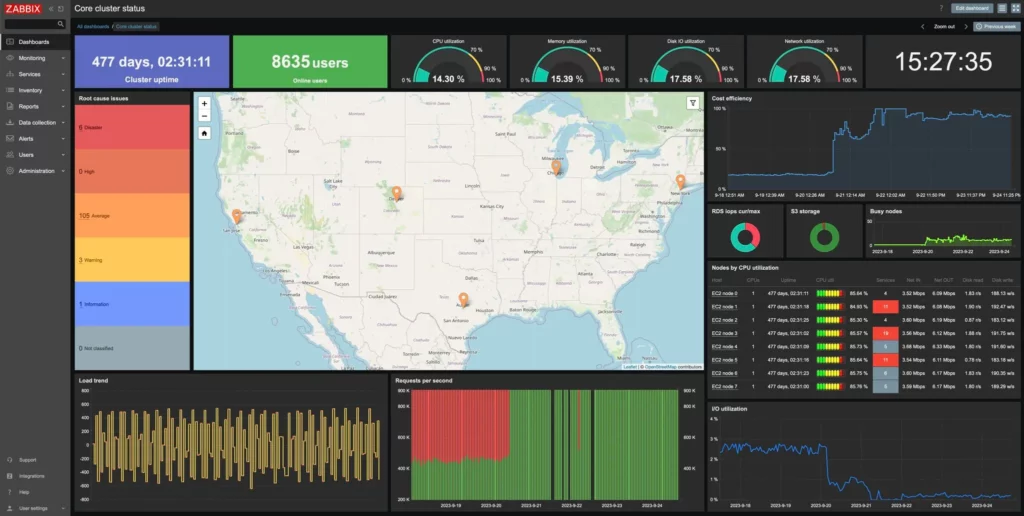
👆Image credits above👆: https://bestmonitoringtools.com/how-to-install-zabbix-server-on-centos-or-rhel/
dnf -y install zabbix-server-mysql zabbix-web-mysql zabbix-nginx-conf zabbix-sql-scripts zabbix-selinux-policy
¶ Create Database Zabbix
mysql -uroot -p
password
mysql> create database zabbix character set utf8mb4 collate utf8mb4_bin;
mysql> create user zabbix@localhost identified by 'password';
mysql> grant all privileges on zabbix.* to zabbix@localhost;
mysql> set global log_bin_trust_function_creators = 1;
mysql> quit;
¶ Populate Zabbix Database with initial schema and data
This step can take a long time. Simply wait...
zcat /usr/share/zabbix-sql-scripts/mysql/server.sql.gz | mysql --default-character-set=utf8mb4 -uzabbix -p zabbix
password
¶ Disable log_bin
mysql -uroot -p
password
mysql> set global log_bin_trust_function_creators = 0;
mysql> quit;
¶ Configure Zabbix server .conf file
- Edit the file
/etc/zabbix/zabbix_server.confand change some parameters as shown below
# remove-comments /etc/zabbix/zabbix_server.conf

LogFile=/var/log/zabbix/zabbix_server.log
LogFileSize=0
PidFile=/run/zabbix/zabbix_server.pid
SocketDir=/run/zabbix

DBName=zabbix
DBUser=zabbix
DBPassword=password

StartPollers=10
StartConnectors=1
StartPollersUnreachable=10
StartPingers=10
StartDiscoverers=10
StartHTTPPollers=10

SNMPTrapperFile=/var/log/snmptrap/snmptrap.log

CacheSize=64M
HistoryCacheSize=32M
TrendCacheSize=8M
ValueCacheSize=32M

Timeout=4

LogSlowQueries=3000
StartProxyPollers=50
StatsAllowedIP=127.0.0.1

StartReportWriters=3
WebServiceURL=http://localhost:10053/report
EnableGlobalScripts=1
¶ WebService with chromium
dnf -y install zabbix-web-service chromium
¶ Configure PHP for Zabbix frontend
- Edit file
/etc/nginx/conf.d/zabbix.confuncomment and set 'listen' and 'server_name' directives.
listen 8080;
server_name zabbix-teste.tiozaodolinux.com;
¶ Adjust nginx to listen on the port number 8080
sed -i 's/ 80;/ 8080;/' /etc/nginx/nginx.conf
sed -i 's/:80;/:8080;/' /etc/nginx/nginx.conf
¶ Enable and Restart nginx
systemctl enable nginx.service

systemctl restart nginx.service
¶ Watch the logs
tail -f /var/log/nginx/{access,error}.log | ccze -A
¶ Validate if the nginx service is listening on port 8080
curl -s http://localhost:8080 | grep "Test Page"
        <title>Test Page for the HTTP Server on AlmaLinux</title>
        <h1>AlmaLinux <strong>Test Page</strong></h1>
¶ Enable and Restart Zabbix server
systemctl enable zabbix-server php-fpm

systemctl restart zabbix-server php-fpm
¶ Watch the logs
tail -f /var/log/zabbix/zabbix_{server,proxy,agent2}.log | ccze -A
¶ Install grafana enterprise
¶ Import the GPG key:
wget -q -O gpg.key https://rpm.grafana.com/gpg.key
rpm --import gpg.key
¶ Create grafana.repo with the following command:
cat << '_EOF' > /etc/yum.repos.d/grafana.repo
[grafana]
name=grafana
baseurl=https://rpm.grafana.com
repo_gpgcheck=1
enabled=1
gpgcheck=1
gpgkey=https://rpm.grafana.com/gpg.key
sslverify=1
sslcacert=/etc/pki/tls/certs/ca-bundle.crt
_EOF
¶ To install Grafana Enterprise, run the following command:
dnf -y install grafana-enterprise
¶ Enable and Restart grafana
systemctl daemon-reload

systemctl enable --now grafana-server.service
¶ Watch the logs
tail -f /var/log/grafana/grafana.log
¶ Finish setup's
¶ Let cron do the work. Add the following lines to your crontab
## Remove unused data
0 */12 * * * docker system prune --all --volumes --force > /tmp/docker-system-prune.txt 2>&1

## Clean SWAP
30 */6 * * * /root/swapclean.sh > /tmp/swapclean.txt 2>&1

## Security updates
0 2 * * * dnf upgrade -y --refresh >/tmp/dnf-upgrade.txt 2>&1
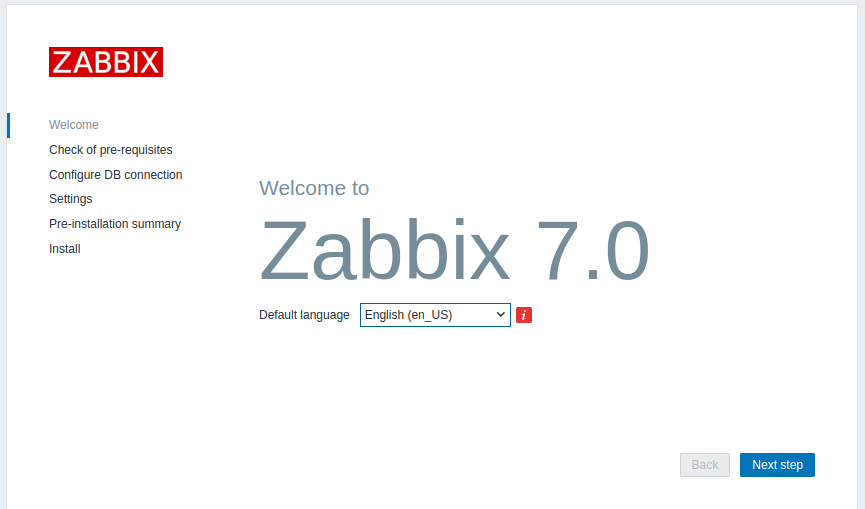
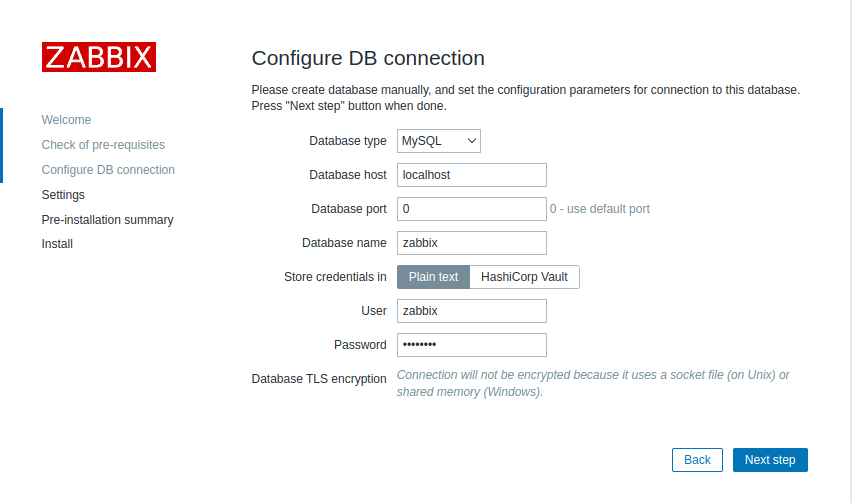
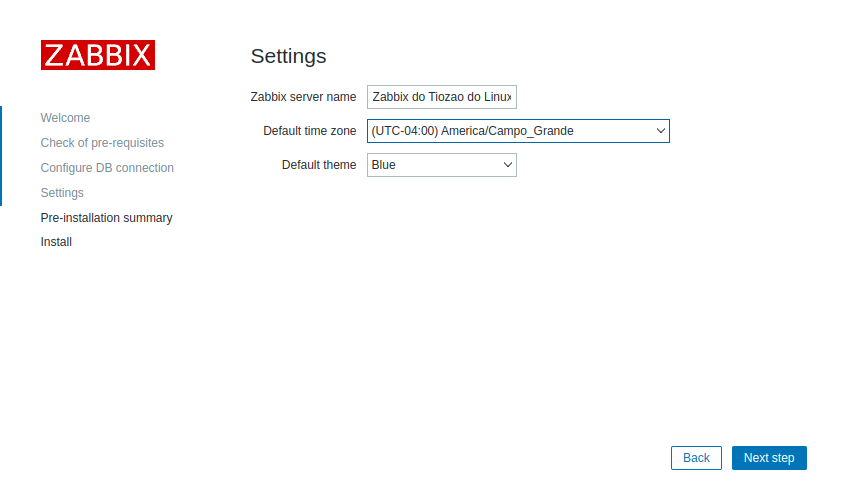
¶ Go to your http://zabbix-teste.tiozaodolinux.com URL and finish zabbix setup
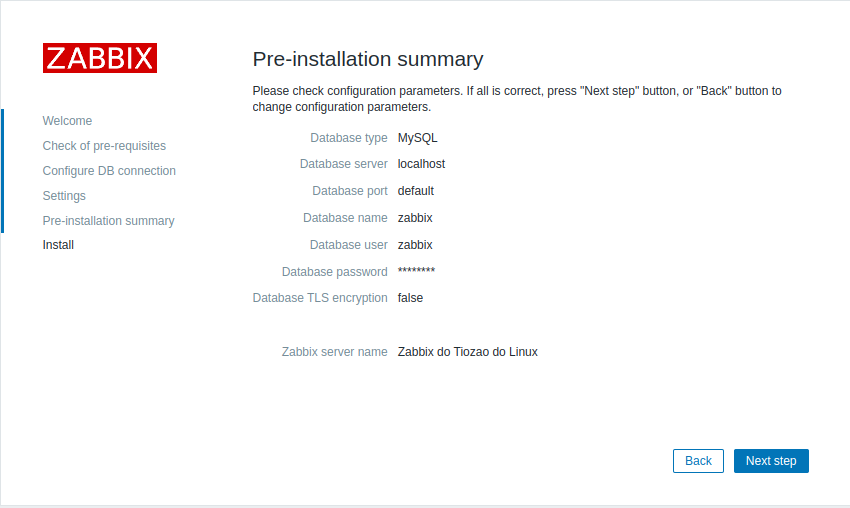
¶ First access

On fresh Zabbix installation, the username is Admin, and the password is zabbix.
Change your password for security reasons
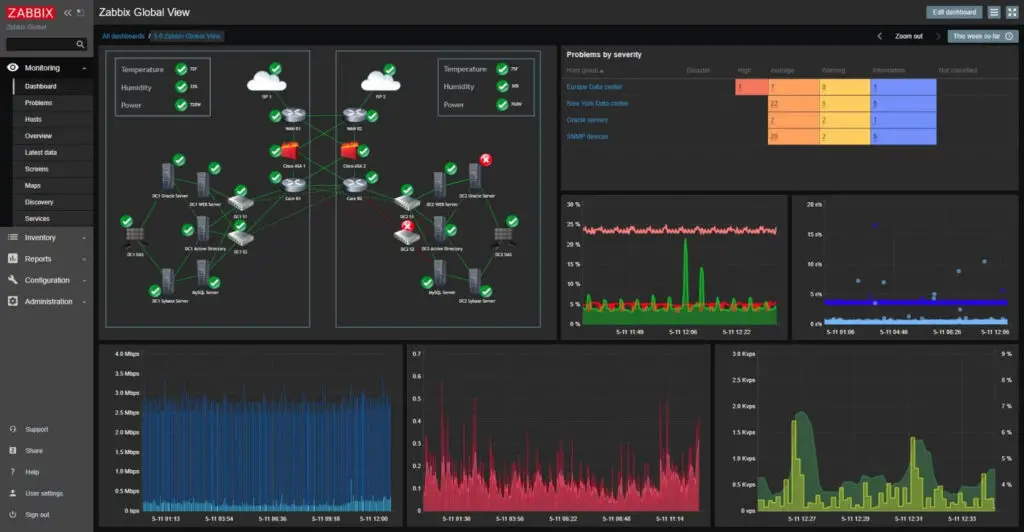
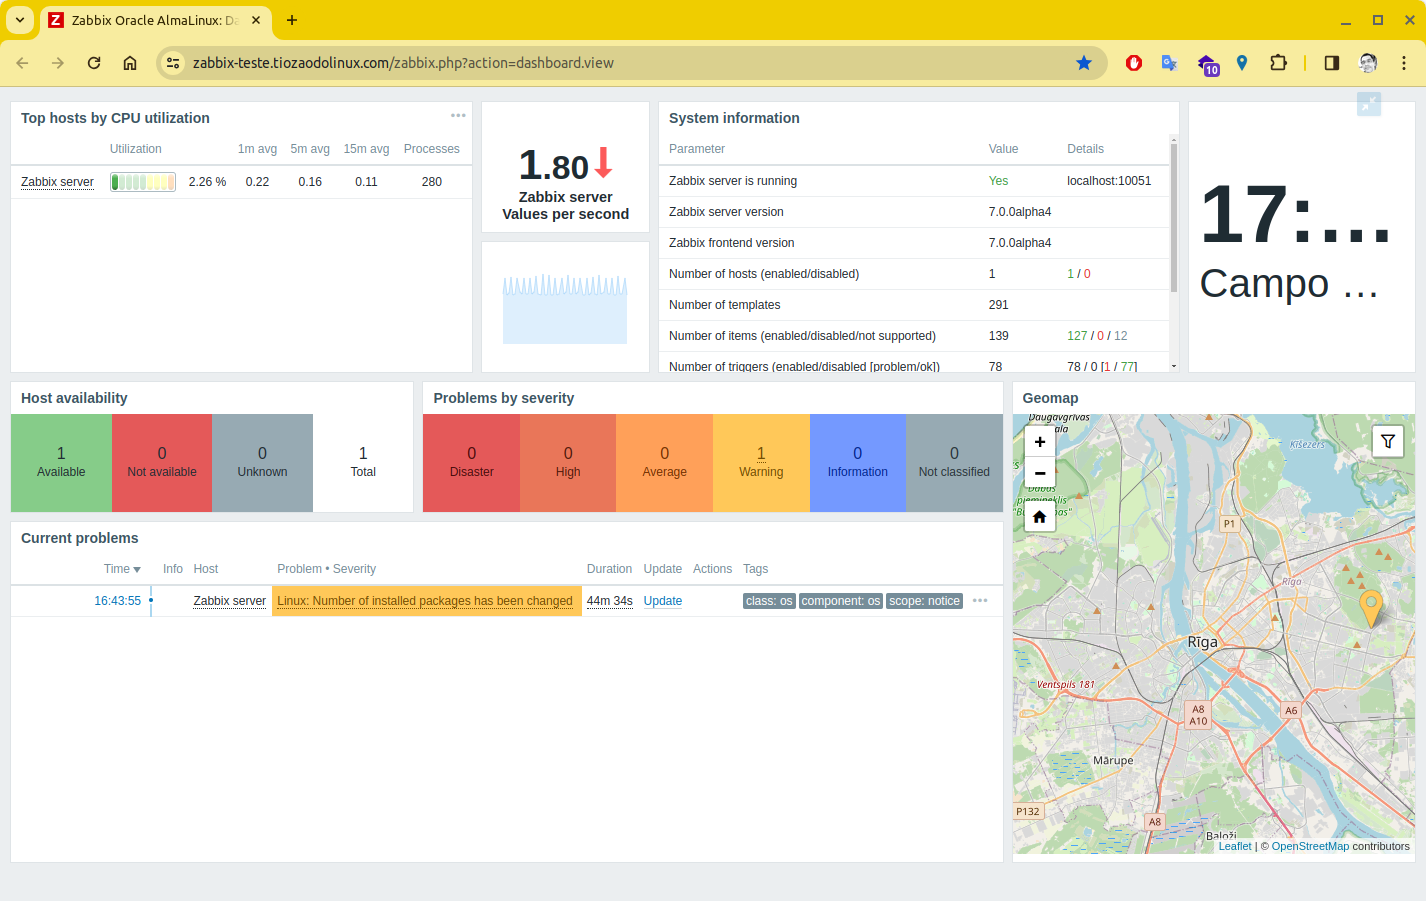
¶ The default dashboard
¶ Go to your http://grafana-teste.tiozaodolinux.com URL and finish grafana setup
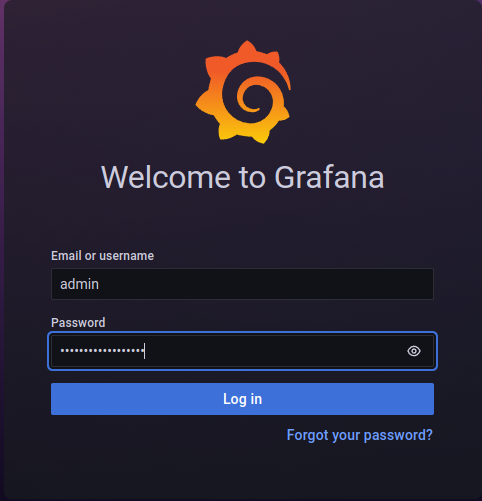
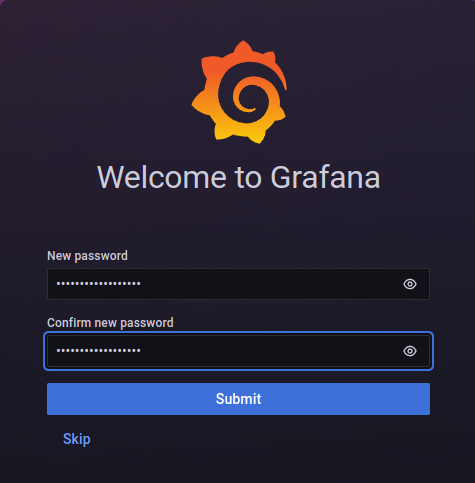
On fresh Grafana installation, the username is admin, and the password is admin.
Change your password for security reasons
Dmitry Lambert - How To Connect Grafana to Zabbix Cloud ( Step By Step )
To resolve doubts and/or suggestions, join the Grupo Tiozão do Linux Telegram group
NOTE: I'm learning English, so there may be some errors that google translated wrong.
¶ References
- Novidades no Zabbix 7.0 LTS - https://youtu.be/VXlYGrjT7mc?si=apR7P41v4SYFzrNb&t=4047
- Install Zabbix - https://www.zabbix.com/download?zabbix=7.0&os_distribution=alma_linux&os_version=9&components=server_frontend_agent&db=mysql&ws=nginx
- Install Grafana - https://grafana.com/docs/grafana/latest/setup-grafana/installation/redhat-rhel-fedora/
- Live Demo Zabbix Grafana - https://play.grafana-zabbix.org
- Install Docker - https://docs.docker.com/engine/install/centos/
- Docker's default-address-pools option - https://straz.to/2021-09-08-docker-address-pools/
- Containers logs - https://docs.docker.com/engine/logging/drivers/json-file/
- Automatic container updater https://hub.docker.com/r/containrrr/watchtower
- Install Nginx Proxy Manager - https://nginxproxymanager.com/setup/
- Firewalld : Basic Operation - https://www.server-world.info/en/note?os=AlmaLinux_9&p=firewalld&f=1
- SELinux : Operating Mode - https://www.server-world.info/en/note?os=AlmaLinux_9&p=selinux&f=1
- Install nginx - https://www.server-world.info/en/note?os=AlmaLinux_9&p=nginx&f=1
- Install systat - https://www.server-world.info/en/note?os=AlmaLinux_9&p=sysstat&f=1
- Performance mysql-server - https://imasters.com.br/data/mysql-performance-tuning-sempre-configure-o-innodb-buffer-pool
- Calculating InnoDB Buffer Pool Size for your MySQL Server - https://scalegrid.io/blog/calculating-innodb-buffer-pool-size-for-your-mysql-server/
- Install oracle-cloud-agent - https://snapcraft.io/install/oracle-cloud-agent/fedora
- Why arm based - https://blogs.oracle.com/cloud-infrastructure/post/why-arm-based-application-development-is-best-on-oracle-linux-in-oracle-cloud-infrastructure
- Why AlmaLinux on OCI - https://cloudmarketplace.oracle.com/marketplace/en_US/listing/127985893
- Monitoring the fail2ban log - https://www.the-art-of-web.com/system/fail2ban-log/
- How Zabbix Proxy Work - https://www.zabbix.com/documentation/current/en/manual/distributed_monitoring/proxies
- Zabbix Proxy Tunning - https://blog.zabbix.com/zabbix-proxy-performance-tuning-and-troubleshooting/14013/ (https://assets.zabbix.com/files/events/meetup_20210310/zabbix_proxy_troubleshooting_performance_tuning_arturs_lontons.pdf)
- Install Zabbix Proxy - https://bestmonitoringtools.com/install-zabbix-proxy-on-centos-rhel/
- Install Zabbix Proxy BR - https://wiki.ifpe.edu.br/books/ti---infraestrutura-e-serviços-de-rede/page/zabbix-instalando-o-proxy

